
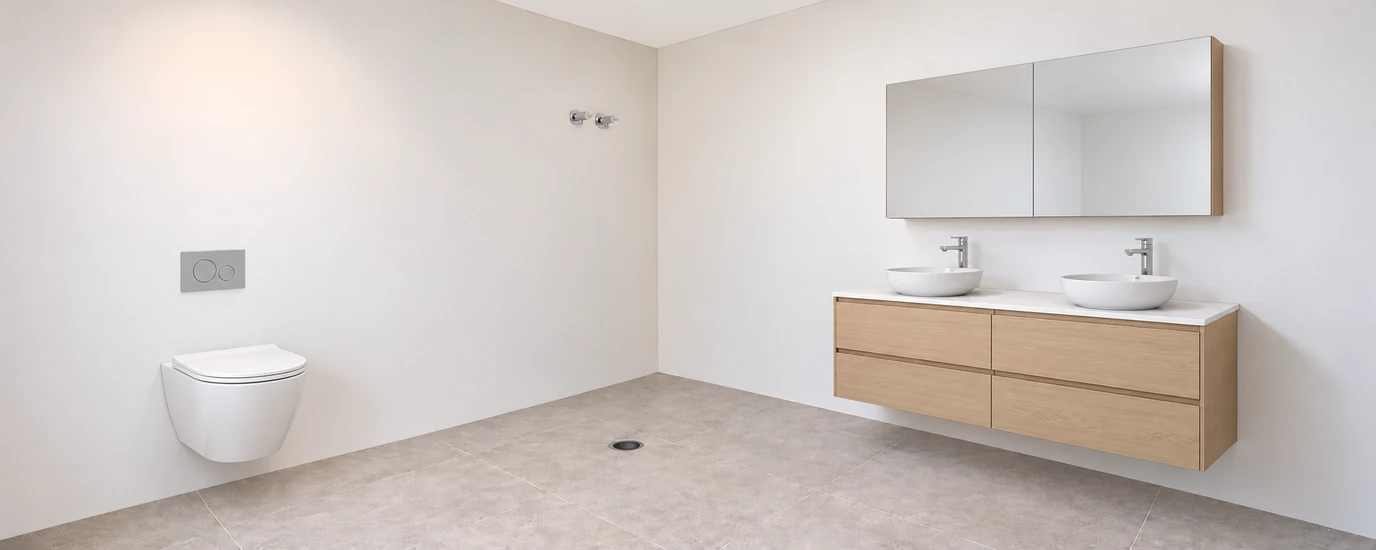
Shower plumbing connections depend on the room and the plumbing already in place. This Aeros guide covers three common starting points:
- A new fit-out with open stud walls and supplies in the ideal position.
- Existing separate hot and cold taps converted to mini stops using breech adapters.
- An existing single mixer that needs separate supply connections and plumbing modifications.
Choose your situation above to go directly to the relevant information.
Each arrangement aims to provide separate hot and cold supplies, one mini stop for each, and suitable hoses to the Aeros shower. Mini stops provide local isolation; the shower’s own mixer controls the water during use. A licensed plumber confirms the fittings, layout and connection requirements for your installation.
1. New fit-out: plan shower plumbing connections before lining the walls
Open stud walls give you and your plumber the opportunity to plan shower plumbing connections around the chosen Aeros model instead of adapting to old tap positions. For shower rough-in plumbing, set out the shower footprint, the finished wall faces and the supply-hose route before the pipework and wall lining are finalised.
In the PEX supply arrangement, each mini stop connects to its own compatible brass wall elbow fitting. Two individual fittings are needed: one supplied by the hot-water PEX pipe and one by the cold-water PEX pipe, with one mini stop fitted to each. They provide separate hot and cold connection points, not a single wall mixer assembly.
For the fittings selected for this example, the wall fitting has an externally threaded male outlet and the mini stop has a matching internally threaded female inlet. The female inlet screws onto the male wall outlet. Your plumber selects compatible fittings and confirms the connection and sealing requirements.
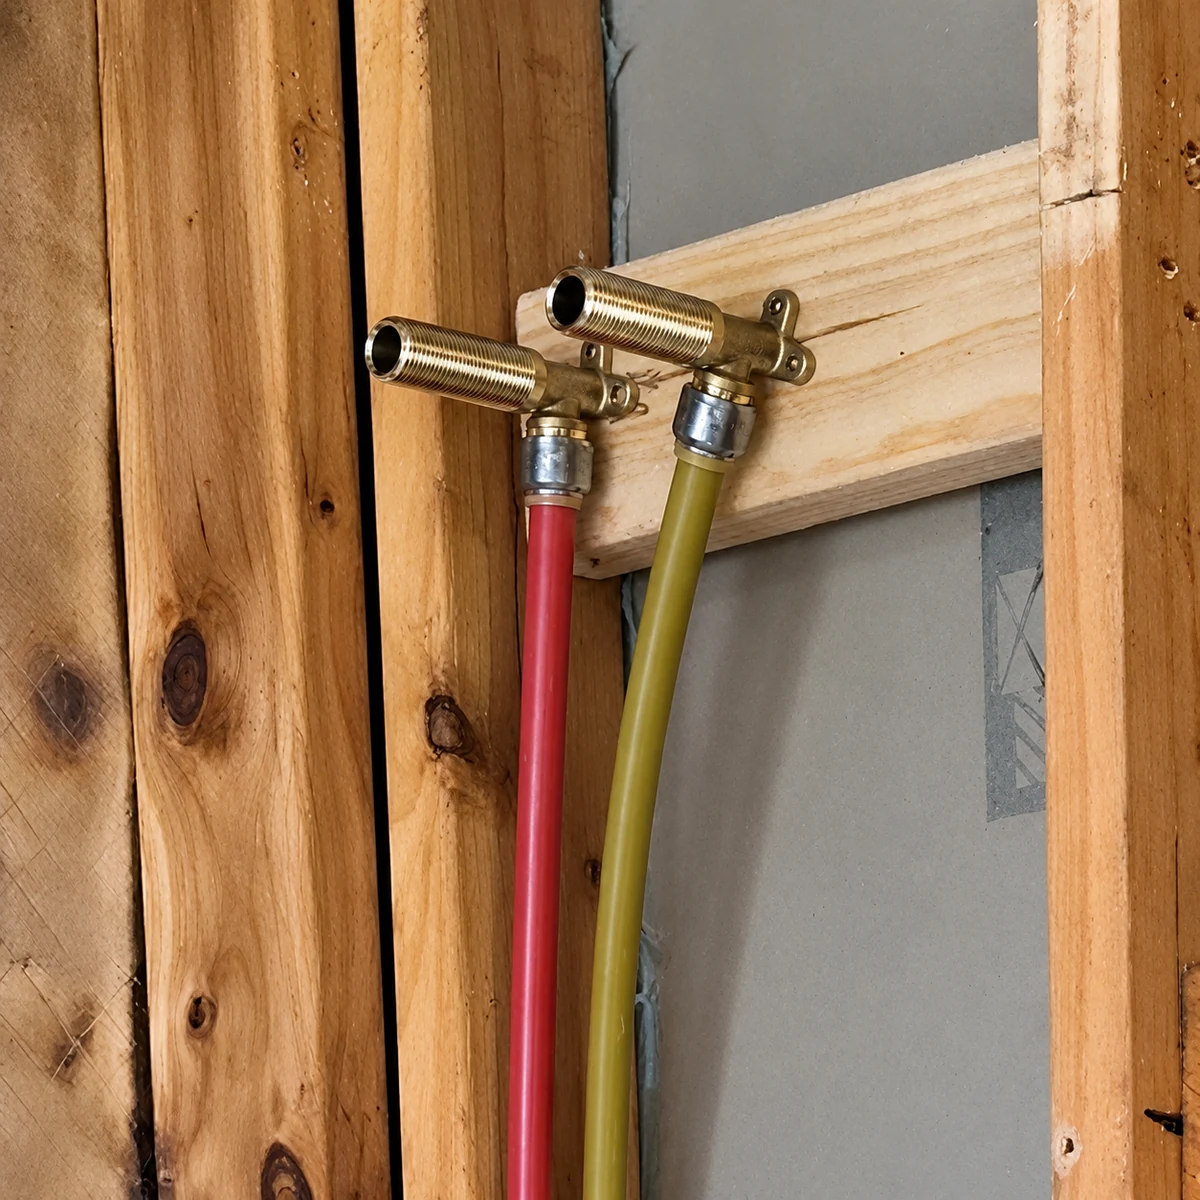
Grouping the two mini stops together gives the installer a clear connection area. Leave room to operate the valves and connect or replace the hoses after the cubicle is installed.
For the preferred new-fit-out arrangement, position the mini stops side by side near the corner, with their connection centres 2150 mm above the finished floor. Confirm the set-out against the chosen Aeros model and the actual site before fixing the pipework.
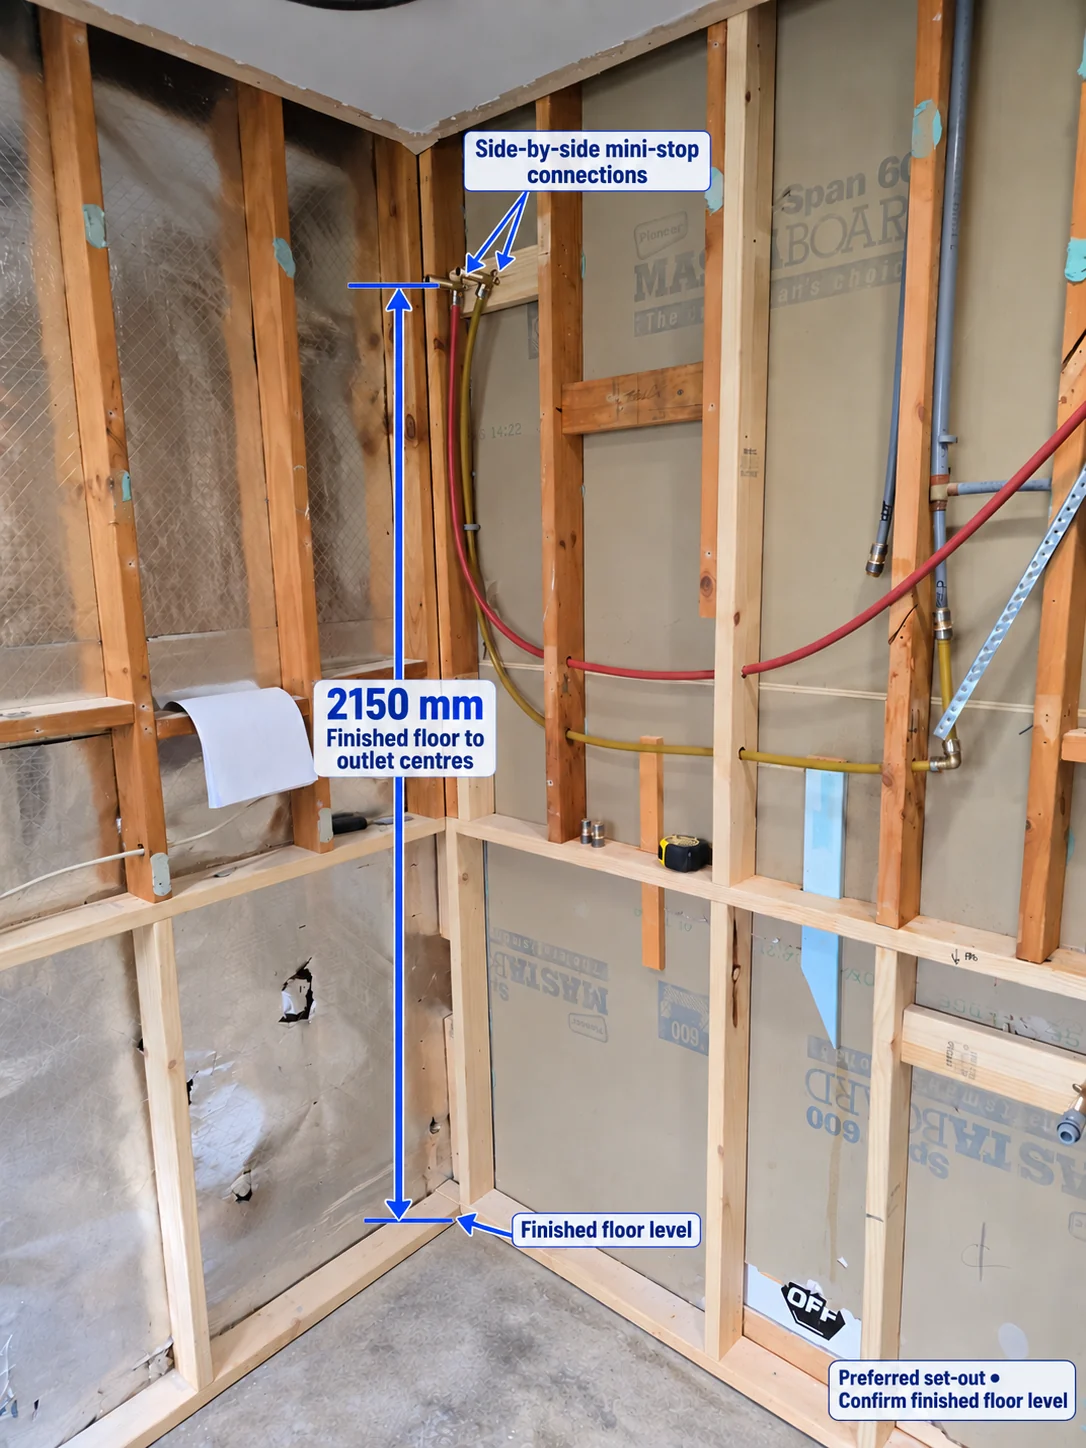
The supply positions need to be coordinated with the actual model, not just the room corner. Allow for the enclosure, finished wall thickness and service access, and avoid a route that forces a sharp bend or traps a hose behind the shower.
Ask the plumber to confirm the set-out before the walls are closed, and keep a photograph and the agreed measurements with your installation paperwork. The shower plumbing connections and waste route should both be settled before the cubicle is put in its final position.
2. Existing hot and cold taps: convert to separate mini stops
How breech adapters adapt shower plumbing connections
The existing tap body
The handle you turn is only part of a wall tap. Behind it is an operating assembly connected to a body in the wall. Removing the handle alone does not expose a ready-to-use hose connection. In this type of conversion, the plumber assesses the body and the related pipework that remain after the relevant tap components are removed.
The breech adapter
A breech adapter provides a different connection from a compatible recessed tap body. Suppliers may describe this family of fittings as recess adapters or recessed tap adapters. The name is useful when discussing the job, but it is not enough to select the right part.
The adapter must match more than the visible thread. Its depth, sealing arrangement and relationship to the existing tap body matter too. A standard extension or threaded nipple should not be assumed to perform the same job.
The mini stop
A mini stop is a small isolation valve. In the arrangement shown here, one is fitted for the hot supply and another for the cold supply. These provide local control of the supplies for connection and future servicing.
The mini stops do not replace the shower’s mixer controls. They form part of the shower plumbing connections. Your plumber selects the valve type and outlet orientation to suit the adapter, hoses, available space and access requirements.
Each image uses the same wall, the same two connection positions and the same viewpoint. Only the fittings change. That makes it easier to see what is retained and what is replaced.
1. Existing hot and cold taps
The starting point shows the two existing taps, including their handles and wall covers. This gives the plumber a useful first view of the layout, but the condition and connection details behind the covers still need checking.
Before planning the new shower position, allow space for the shower plumbing connections, including the finished fittings and supply hoses. The connection should not be crushed behind the cubicle or placed where it cannot be reached for future work.
2. Taps removed, with the recessed connection openings visible
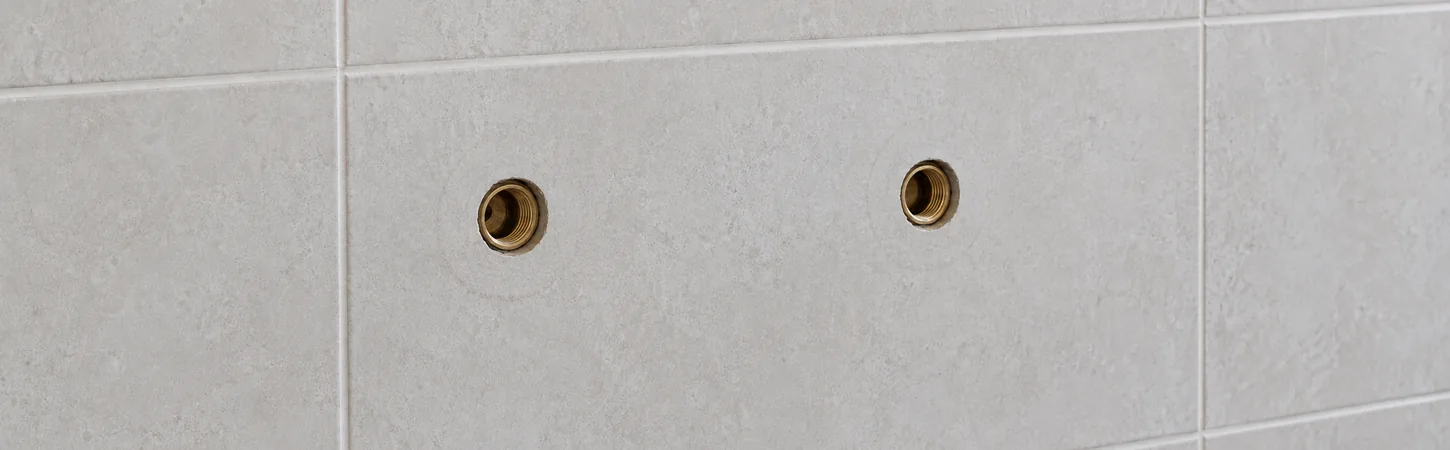
This stage shows the openings left for inspection after the plumber isolates the water and removes the tap assemblies.
The exposed bodies can be checked for damage, wear and suitability for the proposed shower plumbing connections. If the existing parts are in poor condition or incompatible with the proposed conversion, the plumber can explain the repair or alternative arrangement needed.
3. Compatible breech adapters fitted
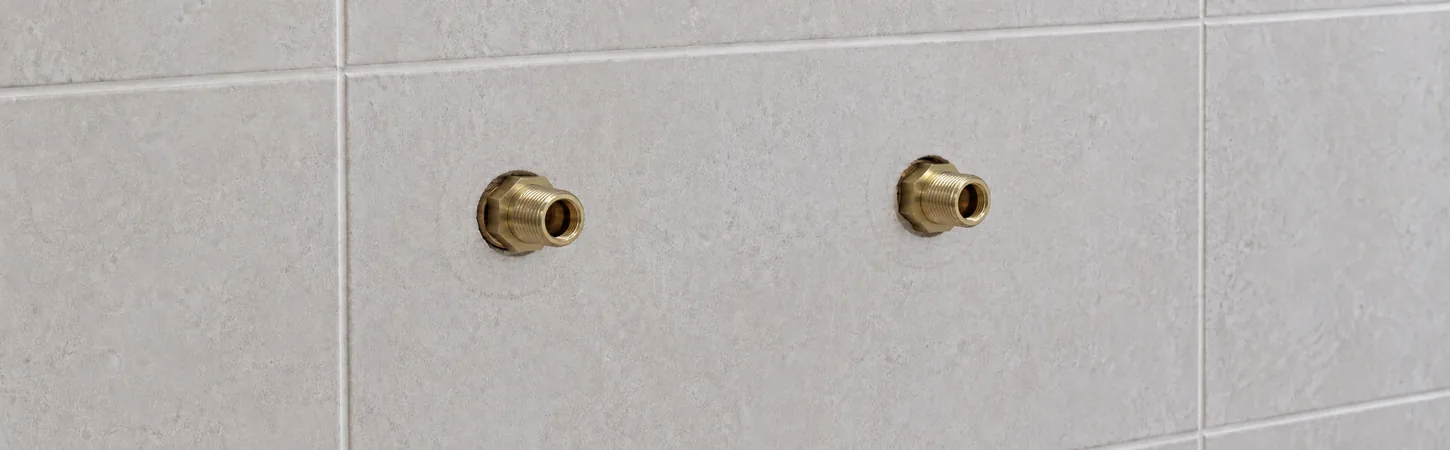
The third picture shows the adapters before the mini stops are added. For the adapter illustrated in this guide, the smooth end is inserted into the recessed tap body first. Keeping this as a separate image helps explain why the small brass parts are needed: they provide the connection between the retained bodies and the new valves.
The plumber checks how the adapter fits and seals in the existing body, following the selected product’s instructions.
4. Mini stops fitted
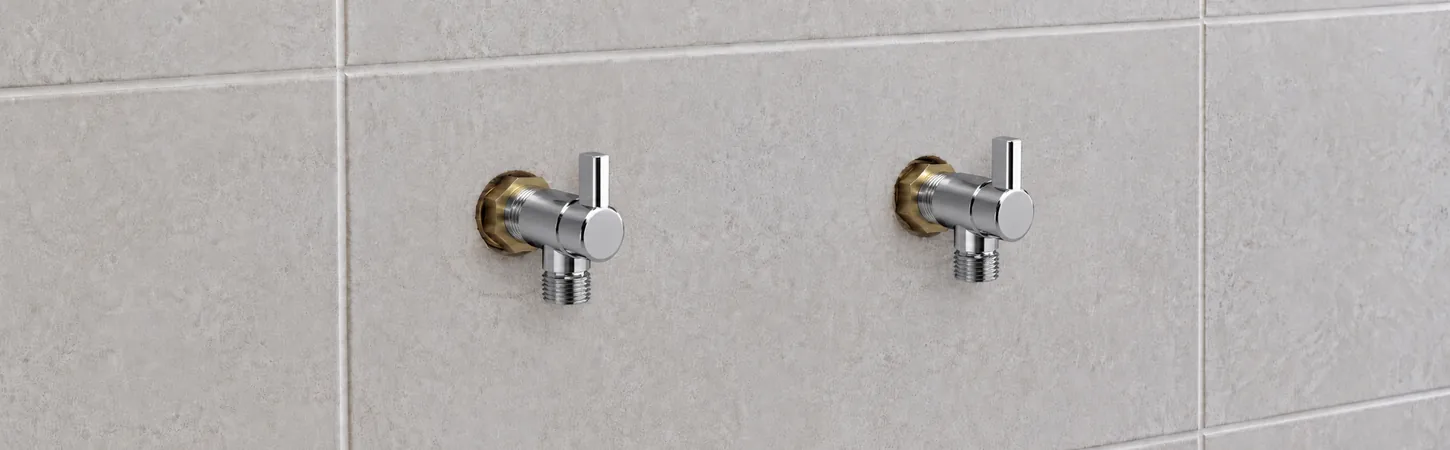
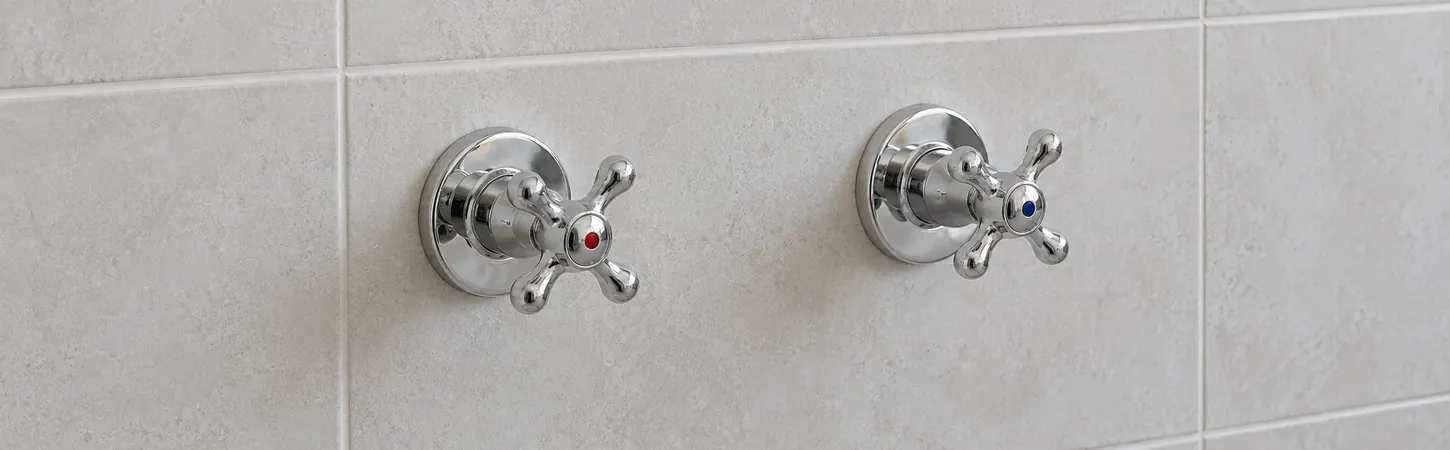
The final picture shows the compact isolation valves on the adapters. The two outlets remain clearly separate. Hoses are not shown in this image, so the valves and their connection to the adapters remain easy to see.
Suitable supply hoses are connected as part of the completed plumbing installation. The plumber checks the completed shower plumbing connections, operation and leaks before handing the shower over for use.
3. Existing single mixer: what needs modification
A single wall mixer combines hot and cold water inside its body before sending mixed water to the shower outlet. That outlet is not a separate hot supply and cold supply, and adding a splitter does not turn it into two independent supplies.
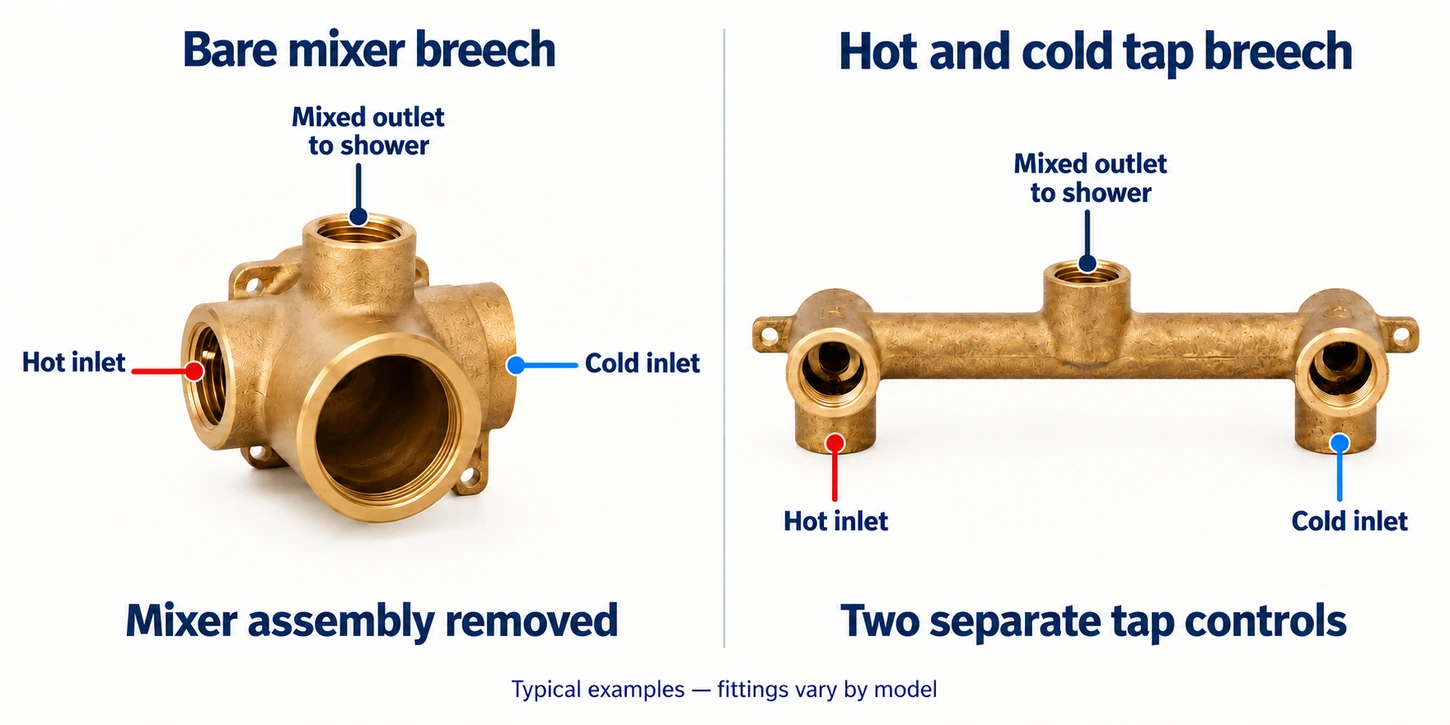
For an Aeros shower with its own mixer, ask your plumber to assess the incoming hot and cold pipework and plan suitable shower plumbing connections with separate supplies to mini stops. The practical approach depends on the existing mixer body, pipework and available access. It may involve opening the wall or access from the other side; do not assume the work can be completed through the existing cover-plate opening.
The plumber can explain what will be retained, what needs changing and how any redundant mixer or outlet will be dealt with. Agree the finished valve positions and hose route before the work starts. The objective is a serviceable pair of supplies for the new shower, rather than simply attaching it to the old mixed-water outlet.
The mini stops connect to suitable individual fittings on those separate supplies. The existing mixer body is not used as the mounting or connection fitting for the two mini stops in this arrangement.
What changes should a quote for shower plumbing connections cover?
The plumber first identifies and accesses the separate hot and cold supplies feeding the old mixer. Those supplies can then be rerouted or reconfigured as appropriate to individual wall fittings and mini stops for the Aeros shower. This is a change to the supply arrangement, not a breech-adapter conversion inside the mixer cartridge opening.
Ask the quote to cover access to the pipework, removal or isolation of redundant fittings as appropriate, the new supply positions, connections and testing. Where wall access is needed, also establish who will reinstate the wall lining, finishes and any affected waterproofing. The amount of access and repair varies with the existing installation; it cannot be established from the mixer handle alone.
What does your plumber need to check?
Ask for the shower plumbing connections to be assessed as a complete arrangement. A fitting that appears to screw in is not, on its own, proof that the installation is suitable.
- Existing tap bodies: identify the body type, its condition and the parts that can safely be retained.
- Adapter compatibility: confirm thread, depth, sealing details and manufacturer suitability for the existing bodies.
- Internal water paths: assess the original breech or other linked pipework so hot and cold supplies remain correctly separated and any unused outlet is dealt with appropriately.
- Valves and hoses: choose compatible products for the intended hot and cold water service and the selected shower.
- Pressure and temperature: check the supplies against the requirements of the shower fittings and the installation.
- Space and servicing: allow for the valve bodies, hose route and access, without forcing or kinking hoses.
- Final testing: check the completed work for leaks and correct operation, including the isolation valves.
Ask the plumber to identify the fittings used in the finished job. Keeping their product details with your shower paperwork can make future replacement or servicing easier.
In Victoria, use the Building and Plumbing Commission practitioner check to check your plumber’s registration or licence and permitted work. Elsewhere, check the relevant local regulator.
How does this fit an Aeros shower installation?
Aeros supplies a complete shower cubicle with a base, glass wall panels, enclosure and model-specific shower fittings. In a suitable room, reusing sound existing supply positions may reduce the amount of new pipe routing and disruption needed around the cubicle.
The enclosure and the building’s plumbing are separate parts of the project. Aeros assembly does not remove the need for correctly selected water connections and drainage. External mini stops and connection hoses are selected to suit the installation rather than assumed to come with every shower.
For an example of planning shower plumbing connections, the 4000 Series buyer’s guide explains the mini stops and separate supply hoses. For the available layouts, browse Aeros shower cubicles. Check the chosen model’s dimensions and installation requirements with the person doing the work.
The waste connection still needs its own plan
Breech adapters address the water-supply connection. They do not solve the wastewater route. Before ordering, agree where the shower waste will connect, what access is needed and whether the room is suitable for the proposed installation.
For a different example using existing laundry supplies, see our laundry bathroom combo guide. That article shows tap splitters sharing suitable existing outlets. A splitter at a finished tap outlet and an adapter in a recessed tap body are different arrangements.
Preparing a quote for shower plumbing connections
You do not need to dismantle anything to start the conversation. Gather a few clear photographs of the existing taps and the proposed shower area. A wider view helps show obstacles; a closer view helps identify the visible fittings.
Tell the plumber which Aeros model you are considering and where you want it positioned. Also explain whether any existing shower outlet or other fixture is to remain in use. This helps the plumber assess the whole layout rather than only the two fittings in the photograph.
Ask the quote to identify the proposed work, the fittings included, any repair allowance, the hose connections and the final checks. Avoid comparing an adapter-only price with a complete installed plumbing quote.
If access to the old bodies reveals damage, the scope may change. Agree how the plumber will discuss that with you before additional work proceeds. There is no single installation time or cost that covers every existing wall tap arrangement.
Shower plumbing connections: common questions
Are breech adapters the same as tap splitters?
No. A splitter divides a suitable existing outlet into more than one connection. The adapter arrangement in this guide changes the connection at a compatible recessed tap body so a mini stop can be fitted. The plumber must select the arrangement for the plumbing that is actually present.
Will an adapter fit every hot and cold wall tap?
No universal fit is claimed. The body type, depth, thread and sealing arrangement all need checking. Do not buy fittings based only on how the handles look.
Can I split the old wall mixer outlet into two shower supplies?
No. For shower plumbing connections, splitting a mixed-water outlet does not recreate separate hot and cold supplies. Your plumber needs to assess the incoming supplies and provide suitable separate connections for the Aeros shower.
Can I keep the old taps and connect hoses directly?
That depends on the actual fittings and the intended installation. A tap with a suitable hose outlet is different from a recessed bathroom tap assembly. Ask the plumber which approach is suitable rather than assuming that one connection method covers both.
Do the mini stops mix the hot and cold water?
No. They provide separate supply isolation. The shower’s mixer controls the blend during use. The complete plumbing arrangement must preserve the correct hot and cold connections.
Will this avoid opening the wall?
It may help retain existing connections where the bodies and pipework are suitable. Repairs, incompatible fittings or a different layout can still require other work. A site assessment is needed before promising that the wall can remain untouched.
Can I do the conversion myself?
Use a suitably licensed plumber for the water-supply conversion and shower connection. This article helps you recognise the parts and discuss the job; it does not provide a removal, sealing or pressure-testing procedure.
Plan shower plumbing connections before choosing the final position
For a new fit-out, plan the separate supplies and mini stops while the stud walls are open. With existing hot and cold taps, compatible breech adapters may allow sound tap bodies to be retained. With a single wall mixer, the plumber assesses access to the separate incoming supplies and the modifications needed to provide independent connections. In every case, plan the shower plumbing connections for the Aeros model and the actual site, and have your plumber confirm suitability and complete the work.
Contact Aeros for help with the shower model and its connection information. Your plumber can then confirm how the existing wall fittings should be adapted for your particular installation.