
Follow this square double door shower assembly guide to put together the tray, rear walls, fixed glass, rails and sliding doors. The 13 numbered images show the sequence, with red arrows highlighting where to lower, rotate or hang each component.
Assembly only: This guide does not show any plumbing work. Water supply connections, drainage and plumbing checks are outside this walkthrough.
Before you start: square double door shower assembly
Read through all 13 steps before handling the panels. Keep the components organised in assembly order and compare them with the images. This sequence shows the rear walls and fixed glass rotating from inside the shower outwards. Follow that direction when joining these panels.
Use the square double door shower assembly images as a sequence, rather than treating each picture as a separate instruction. Some parts are deliberately shown raised, angled or resting loosely because another movement follows. Read the complete step before moving a panel, and check the following image to understand the position you are working towards.
The red arrows show movement. A straight downward arrow means lower the component; a curved arrow shows the direction of rotation. On the sliding doors, the angled top arrow shows the door being hung in the upper rail, and the lower curve shows the bottom wheels moving into the track. Opposite sides use mirrored movements.
This square double door shower assembly guide shows an enclosure with two sliding doors and push-button bottom wheels. If the parts supplied with your shower differ from those shown, contact Aeros before continuing. Have your model number and a photograph of the part ready so we can help identify the correct assembly instructions.
Start with the tray, then work through the middle panel, rear walls, bottom rail and fixed glass. The top rail and sliding doors come next, followed by the handles and strips. Keep glass panels supported while positioning them, and do not force a connection that does not line up.
Assembly: step by step
Follow the numbered images and instructions below.
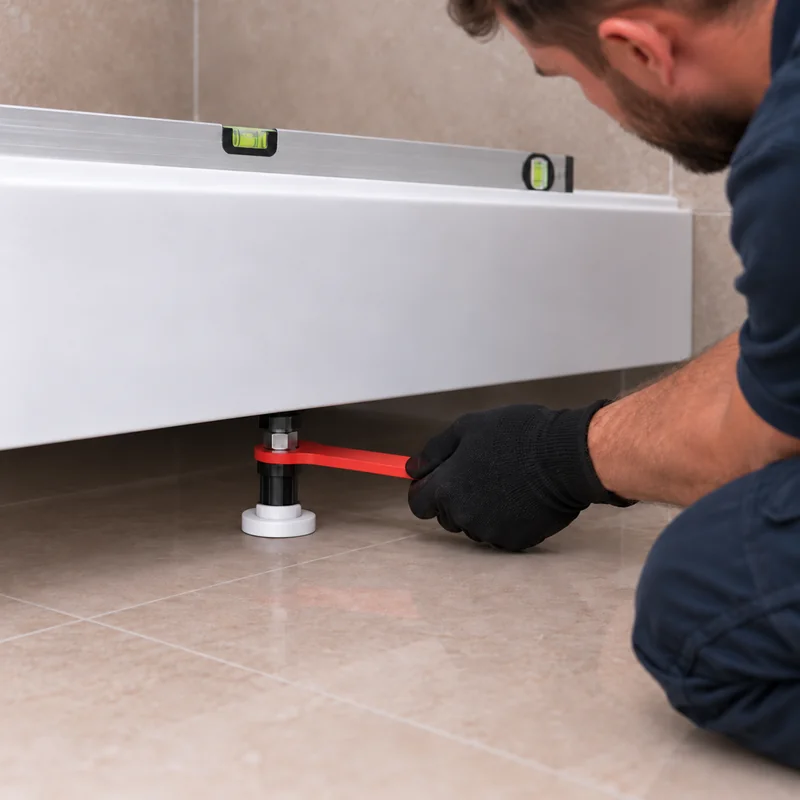
Adjust the tray feet
Adjust the feet beneath the shower tray before building the enclosure. This is the starting point for a level base. Use the first image to identify the feet and their position beneath the tray. Keep the tray supported as you make the adjustments, and move to the level check before fitting any panels.
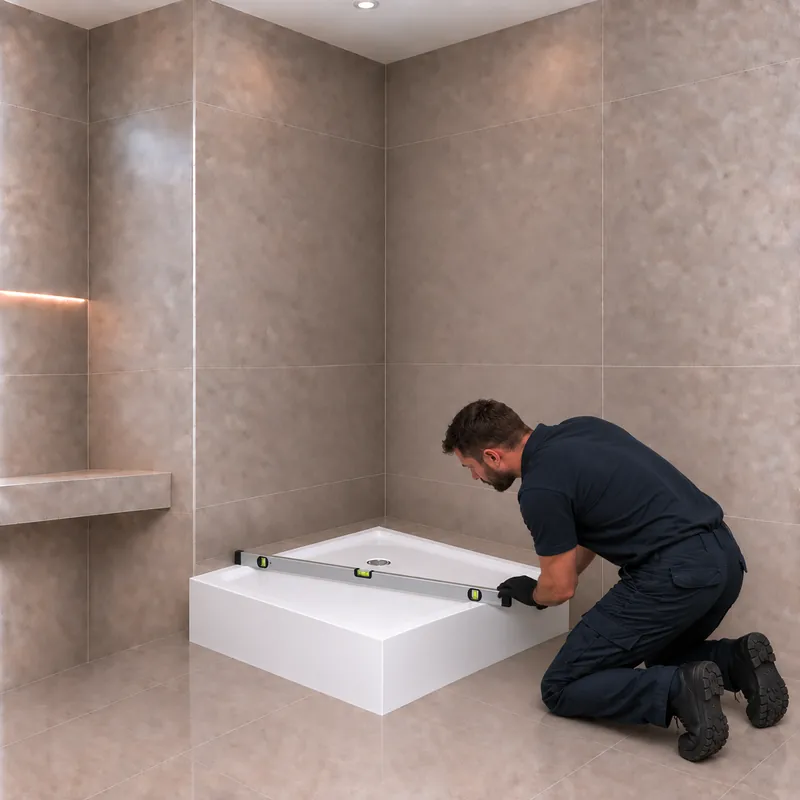
Check the tray is level
Place a spirit level across the shower tray and check it in both directions. Recheck the feet if the tray is not level. Taking time at this stage helps you line up the rear walls, fixed glass and door rails as assembly progresses. Complete this check before positioning the tray for the following steps.
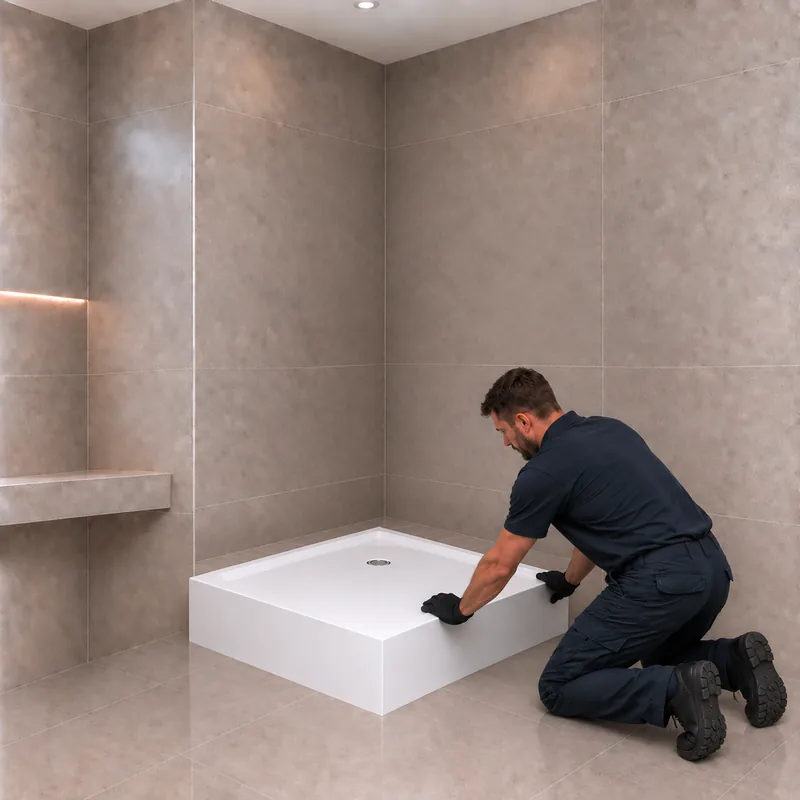
Position the shower tray
Move the levelled shower tray into its assembly position, as shown. Leave yourself room to handle the panels and follow their rotation path. Check the level again after moving the tray. This step covers positioning the tray only; the images do not show the waste connection or any other plumbing work.
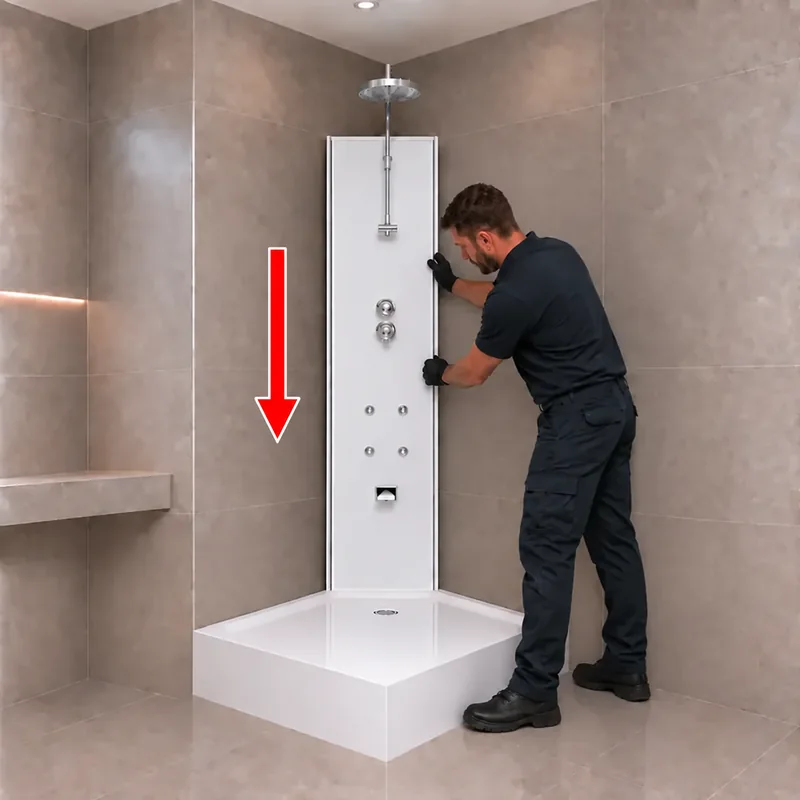
Lower the centre panel into place
Bring the middle panel over the rear corner of the tray and lower it into position. The downward arrow shows the movement. Keep the panel upright and supported while preparing the first rear wall. In this guide, “centre panel” and “middle panel” refer to the same component.
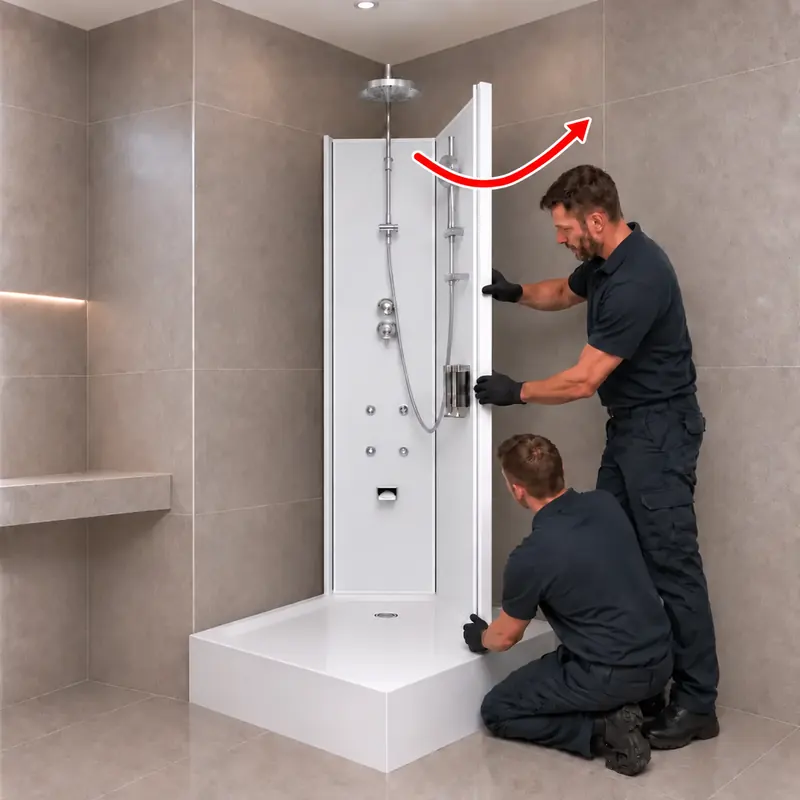
Rotate the first rear wall outwards
Lock the first rear wall into the middle panel, then rotate it outwards from inside the shower into position. Follow the curved arrow in the image. Engage the joining edge before rotating the wall; do not try to push the wall straight into its final position from outside the enclosure.
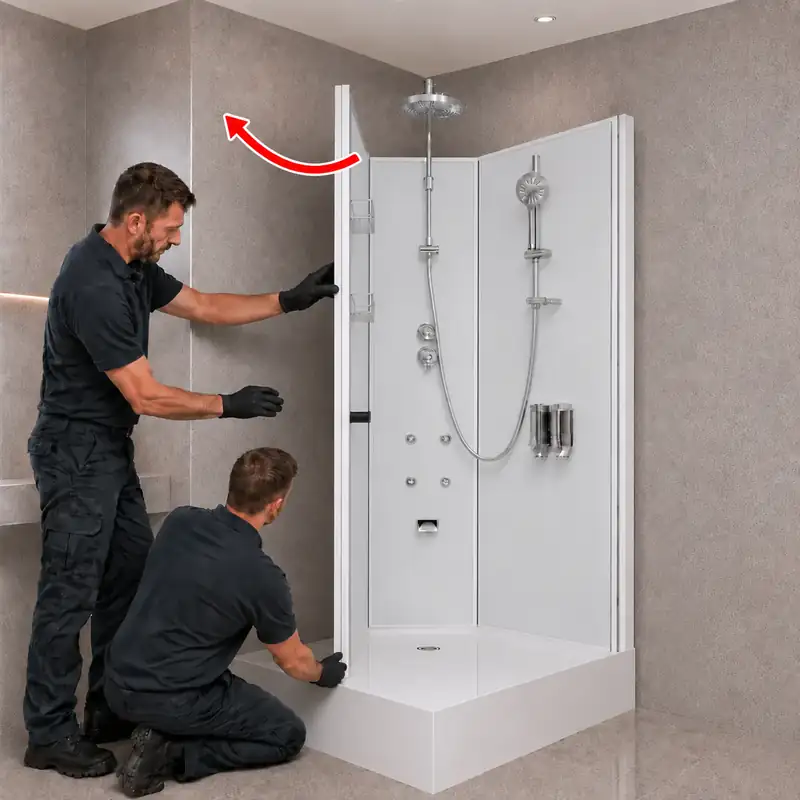
Rotate the second rear wall outwards
Lock the second rear wall into the middle panel and repeat the inside-to-outside rotation on the opposite side. The arrow now points in the other direction. Keep the joining edge engaged as the wall rotates. Both rear walls should be in position before moving on to the bottom door rail.
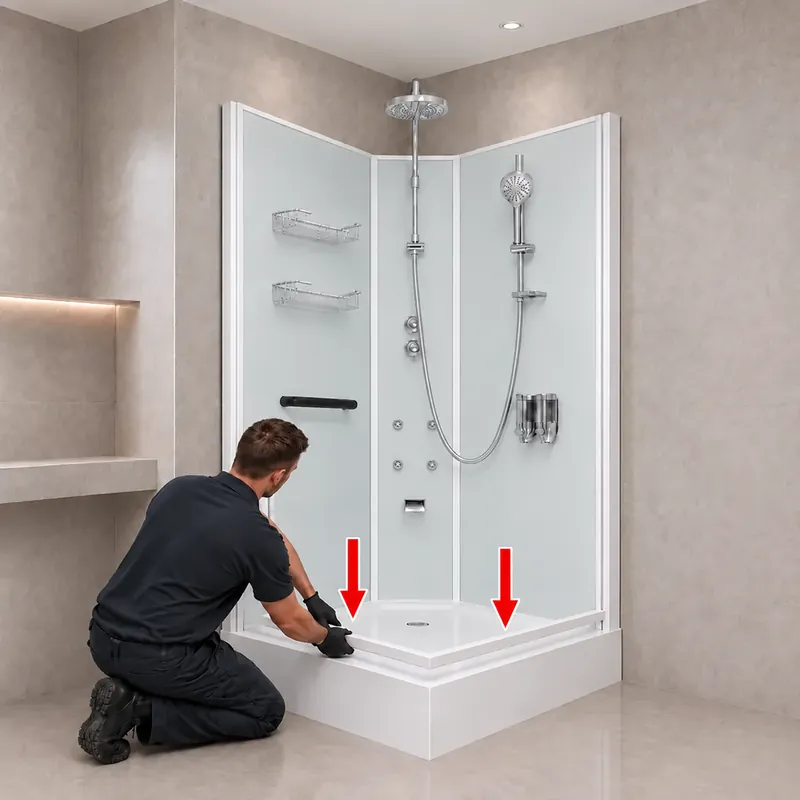
Place the bottom door rail
Place the bottom door rail at the front of the shower tray, following the two downward arrows. It does not lock into anything yet. At this stage, you are positioning the rail ready for the fixed glass panels. Do not mistake this temporary loose position for a missing connection.
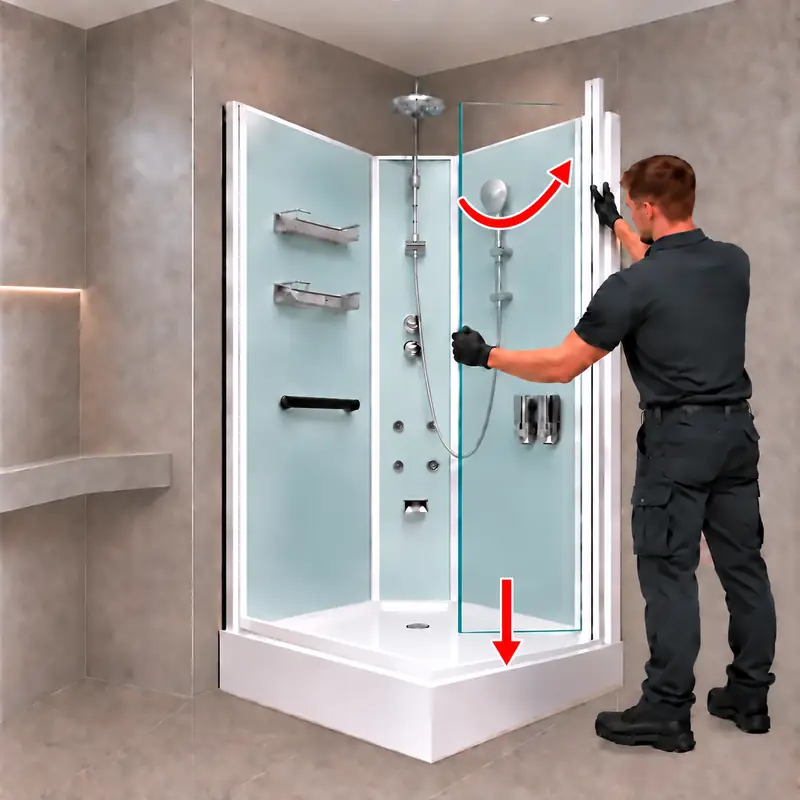
Fit the right fixed glass panel
Lock the right fixed glass panel into the edge of the rear wall, keeping it slightly higher than the bottom door rail. Rotate the glass from inside to outside until it is flush with the front. Then lower it over the bottom door rail block. Follow the curved arrow first and the downward arrow second.
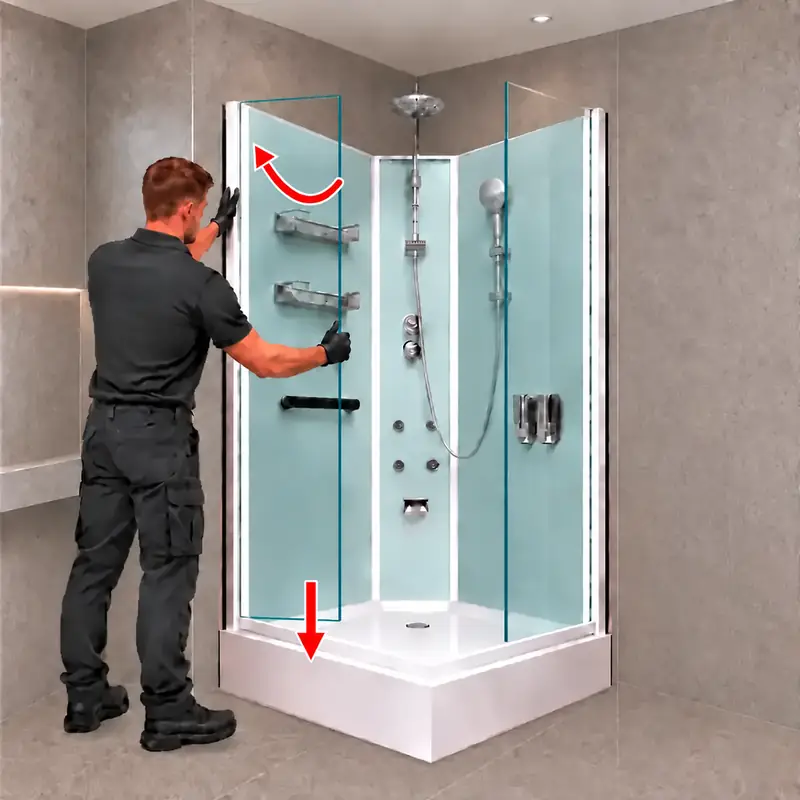
Fit the left fixed glass panel
Lock the left fixed glass panel into the edge of the opposite rear wall, slightly above the bottom door rail. Rotate it from inside to outside until it is flush with the front, then lower it over the bottom door rail block. This repeats step 08 on the other side of the shower.
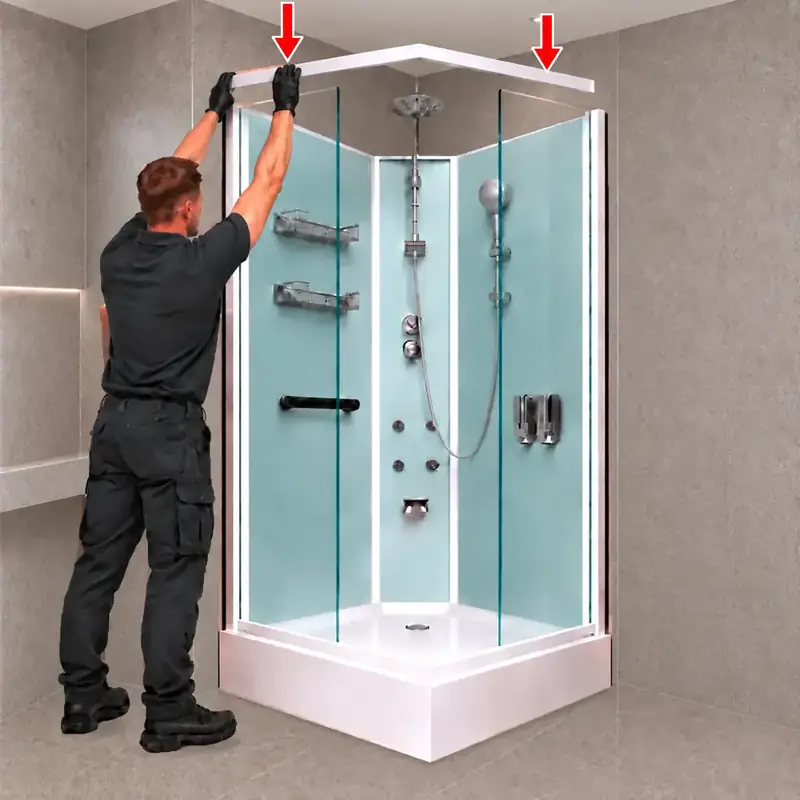
Fit the top door rail
Lower the top door rail over the fixed glass panels and slide the fixed glass into the top door rail blocks. The two arrows show where the rail comes down. Check the relationship between the glass and the blocks before moving on to the sliding doors.
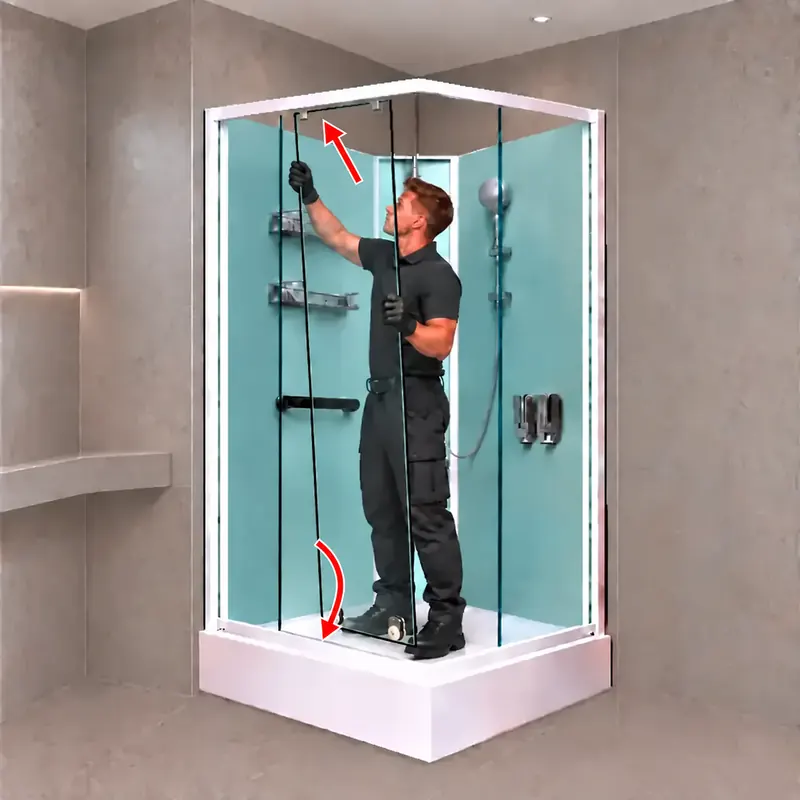
Hang the left sliding door
Hang the wheels at the top of the left door in the top rail. Next, press the buttons on the bottom wheels so you can insert them into the bottom track. The angled upper arrow shows the hanging direction, while the lower curved arrow shows the bottom of the door moving into the track.
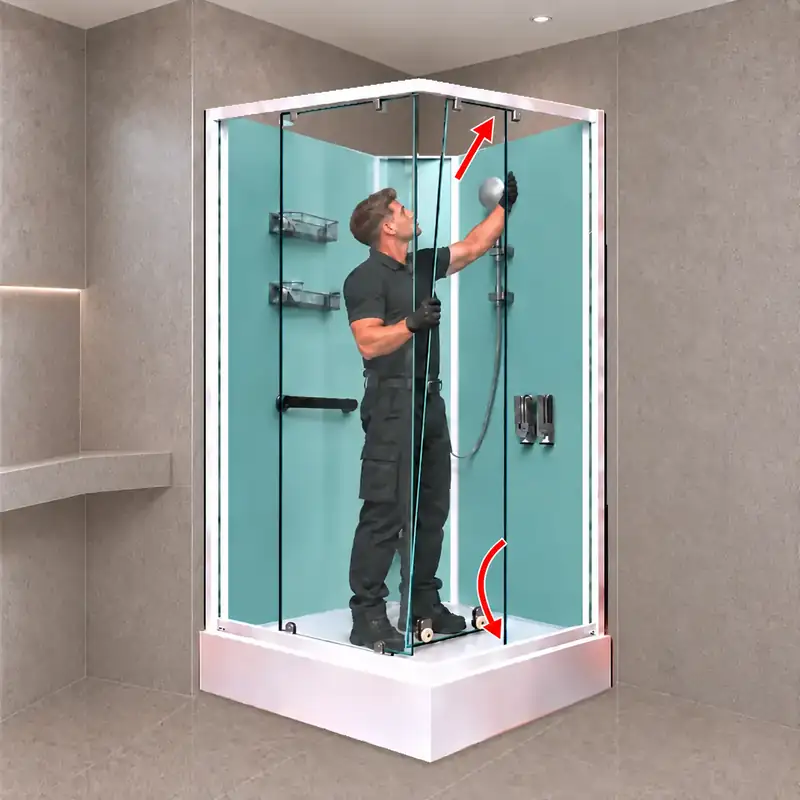
Hang the right sliding door
Hang the wheels at the top of the right door in the top rail. Press the buttons on its bottom wheels to insert them into the bottom track. The arrows are reversed for this door. Both doors use the same sequence: hang the top wheels first, then insert the bottom wheels.
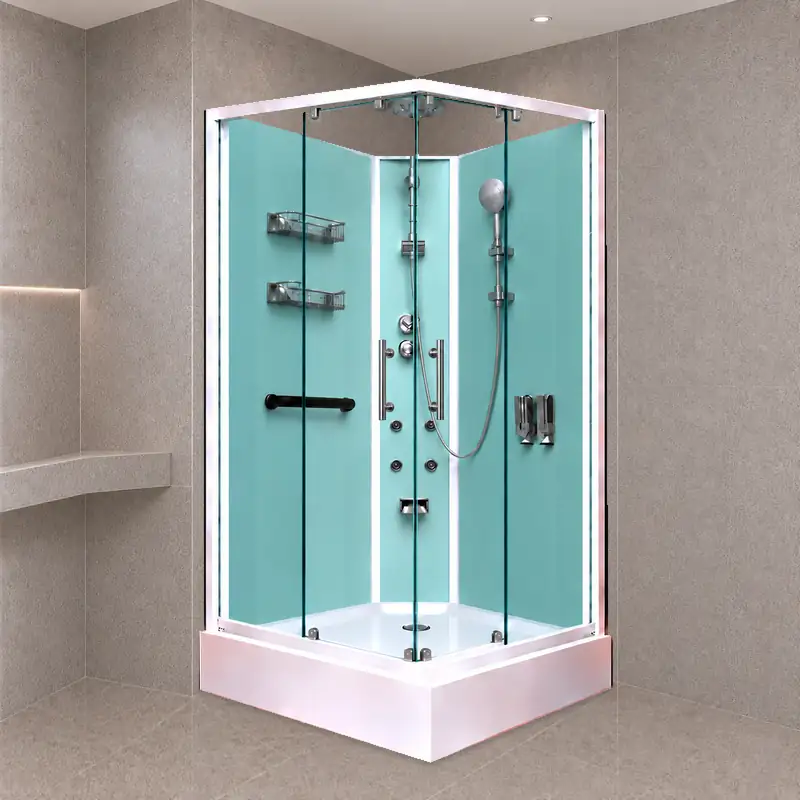
Attach the handles and strips
Attach the door handles, magnetic door strips and water splash strips to complete the shower assembly. Check that both doors move along their tracks and meet correctly when closed. The final image shows the assembled enclosure. Completion of this assembly sequence does not mean the plumbing has been connected or checked.
Final checks for square double door shower assembly
Review the panel joints and the positions of the fixed glass within the rail blocks. Check that the top and bottom door wheels are in their tracks, then move each door gently through its travel. Make sure the handles, magnetic strips and splash strips have been fitted. If anything looks different from the guide or a door does not move correctly, ask Aeros for help before proceeding.
Work through these checks in the same order as the square double door shower assembly. Start at the base, look at the rear wall connections, then check the fixed glass and rails before moving to the doors. This makes it easier to identify the stage that needs attention without changing several connections at once.
A finished-looking enclosure is not a plumbing check. The final illustration confirms the assembly sequence only. Keep the water supply and drainage work separate from this guide, and do not use the finished image as confirmation that the shower is ready to run.
Square double door shower assembly FAQs
Why is the bottom rail loose at step 07?
It is only being placed on the tray at that point. The next steps show the fixed glass panels rotating into position and lowering over the bottom door rail blocks.
Steps 07, 08 and 09 should therefore be read together. The rail is positioned first, followed by each fixed glass panel. If you are unsure where a panel meets the rail block, compare the downward arrow with the bottom edge of the glass before lowering it. Do not add a different fixing simply because the rail is loose at step 07.
Which direction do the panels rotate?
Both rear walls and both fixed glass panels rotate from inside the shower towards the outside. The left and right arrows point in opposite directions because they show opposite sides of the enclosure.
For the fixed glass, rotation and lowering are separate movements. Keep the glass slightly above the bottom rail while engaging the rear wall edge. Rotate it until it is flush with the front, then lower it over the rail block. Reversing those movements can leave you trying to rotate a panel that has already been lowered into position.
Does this guide include the plumbing?
No. It covers shower assembly only. The water supply, waste connection and plumbing checks are not demonstrated in these images.
For the separate plumbing work, Victorian customers can use the official plumber registration and licence search to check a practitioner. Customers elsewhere should use their state or territory regulator’s register.
Need help with your Aeros shower?
Use our customer service form for assembly assistance. Include the step number, shower model and a clear photo of the connection you are working on. For model information, see the 4000 Series buyer’s guide or 14000 Series buyer’s guide.